

When a recording has more than one person in it, Fluen can work out who is speaking and mark it in the subtitles. You decide how that looks: a dash on every change of speaker, the speaker's name, or nothing at all. Speaker marks are off by default. This guide covers the three options, where to switch them on, the Speakers panel in the editor, how the names look on the video, and how to rename or reassign a speaker.
How it works
Alongside the transcription, an industry-leading speaker recognition model listens for distinct voices and assigns every subtitle to the right one. It works on any language Fluen transcribes. Running it costs no credits, and it usually takes under a minute (longer on files over 30 minutes). If you know how many people speak, telling Fluen at upload makes the result more accurate.
Dashes, names or off
| Option | What the subtitle looks like | Good for |
|---|---|---|
| Off | When we first started looking at the data, the patterns were surprising. | Single-speaker content, voice-overs, lectures |
| Dashes | - When we first started looking at the data, - And what did you find? | Broadcast-style subtitles where a dash marks each change of speaker |
| Names | [Lena Halberg] When we first started looking at the data, | Interviews, podcasts, panels, meeting transcripts |
The table shows names the way subtitle files carry them. On the video, in the editor and in burned-in exports, the caption style draws the name as a label of its own instead: see Names on the video below. A dash marks a change of speaker, so a file where only one person speaks shows no dashes.
Where to turn it on
As a workspace default
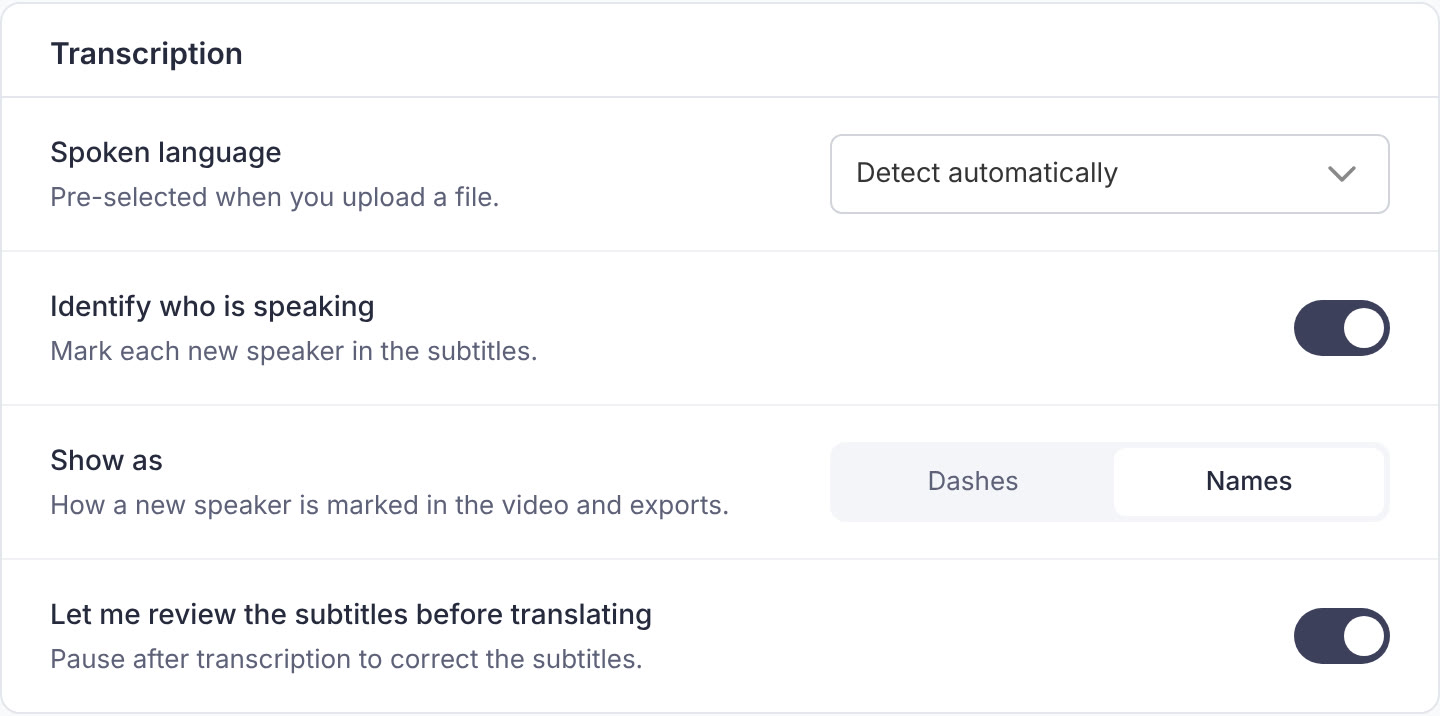
Open Workspace Settings, then Subtitle Defaults. In the Transcription card, turn on Identify who is speaking, then set Show as to Dashes or Names (it starts on Dashes, the subtitling convention). Every new upload in the workspace starts with that choice. Details in Set your default subtitle specifications.
For one upload
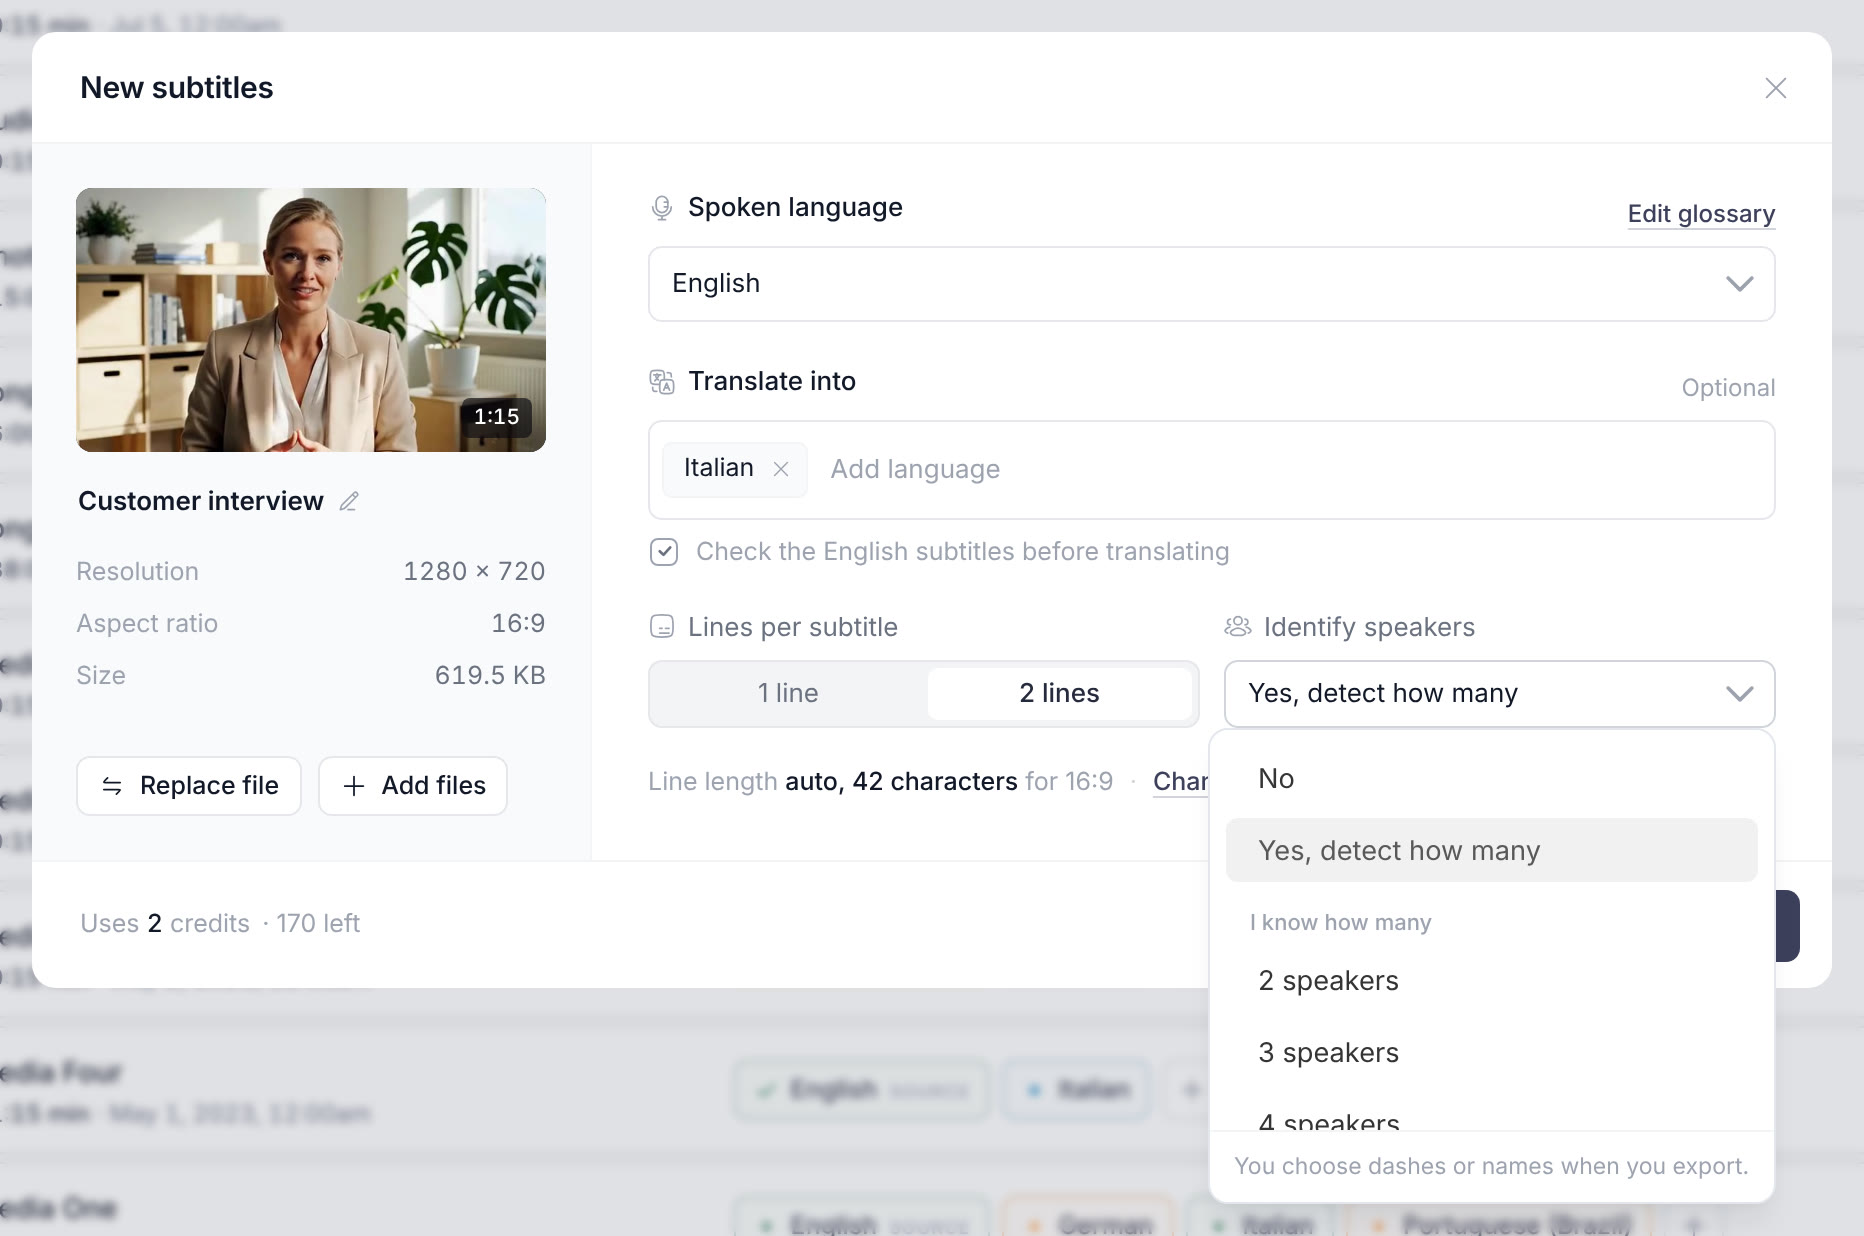
In the upload window, open Identify speakers and pick No, Yes, detect how many, or, under I know how many, the number of people who speak (2 to 6). This overrides the workspace default for that file only. The speakers are marked the way the workspace shows them (dashes if it has no default), and you can switch between dashes and names later in the editor or when you export.
On a track that already exists
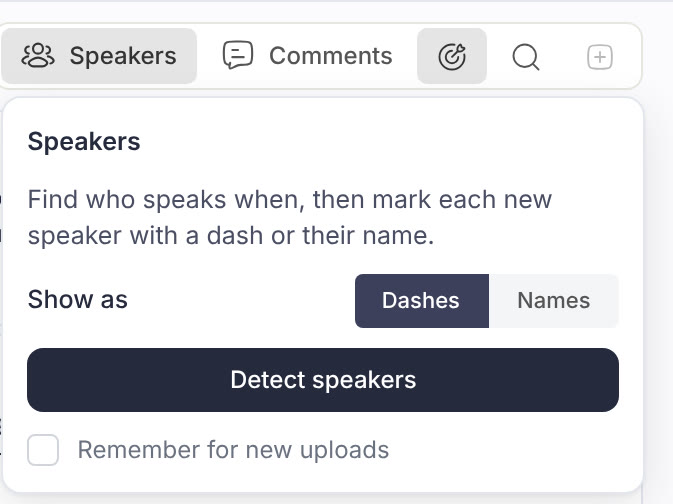
In the editor, click Speakers in the toolbar above the subtitle list. If speaker detection has not run on this file yet, the panel offers it: choose Dashes or Names under Show as and click Detect speakers. The workspace owner can also tick Remember for new uploads to make it the workspace default. The panel shows "Finding speakers…" while it works, and the subtitles unlock when it is done. If it does not finish, click Try again.
The Speakers panel
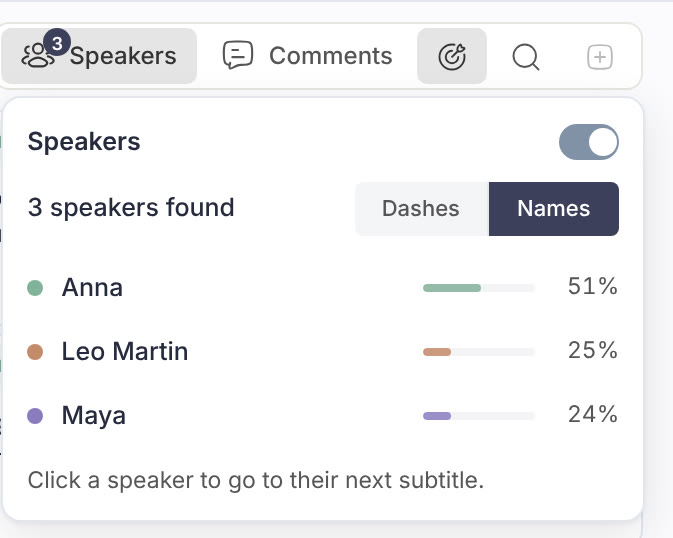
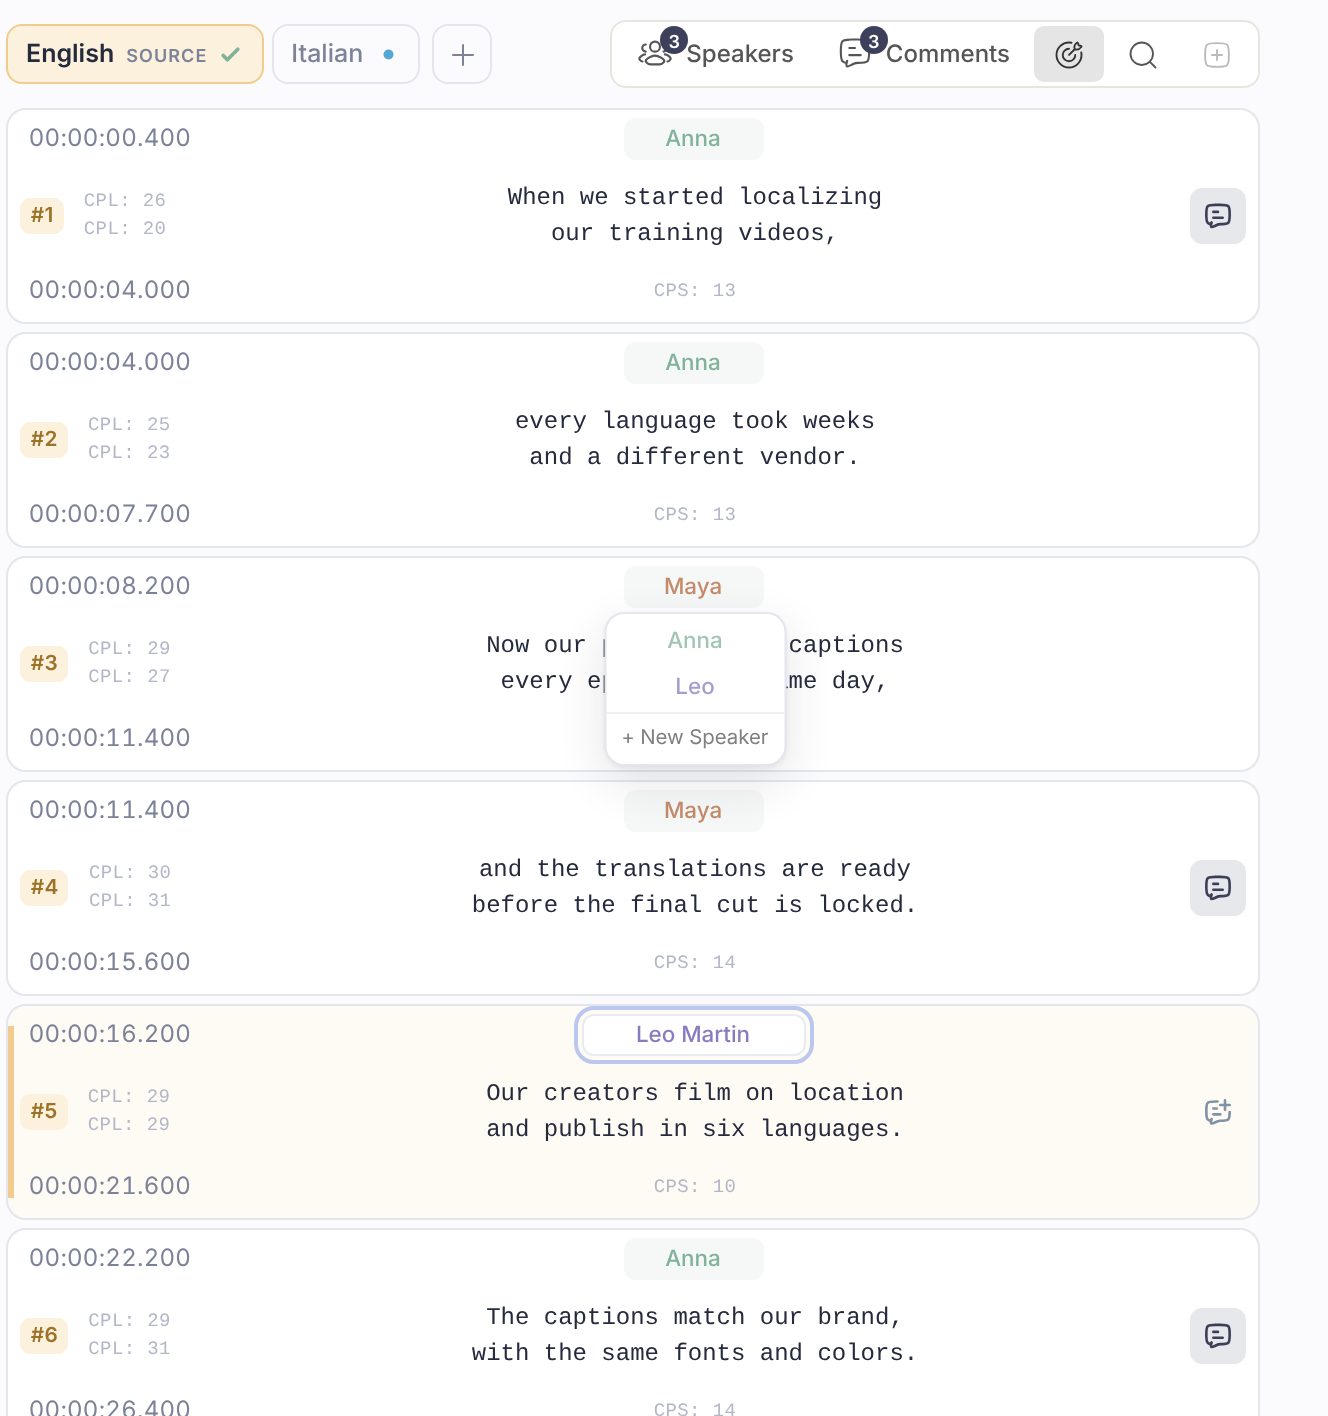
Once speakers are found, the Speakers button shows how many, and its panel lists them:
- The switch at the top turns the speaker marks on or off for this track. Dashes or Names beside the count changes how they show.
- Each speaker has a colour and their share of the speaking time, the most talkative first.
- Type over a name to rename that speaker everywhere in the track. With Names on and nobody named yet, the panel asks for their names and starts in the first one.
- Click a speaker to go to their next subtitle; click again to step through them.
Renaming and reassigning speakers
With speakers on, every subtitle in the editor shows its speaker's name above the text, in a colour of its own, whether the track shows dashes or names. The colour is an editor aid only: subtitle files use the dash or the name in square brackets, and the video uses the caption style's label.
- Rename a speaker: click the name, type the real one and press Enter. The new name applies to every subtitle of that speaker, in one go.
- Reassign one subtitle: click the small arrow next to the name and pick another speaker from the list. The last entry, + New Speaker, creates a speaker who was not detected and assigns the subtitle to them.
- Subtitles the model could not attribute are labelled Unknown; assign them the same way.
Names on the video
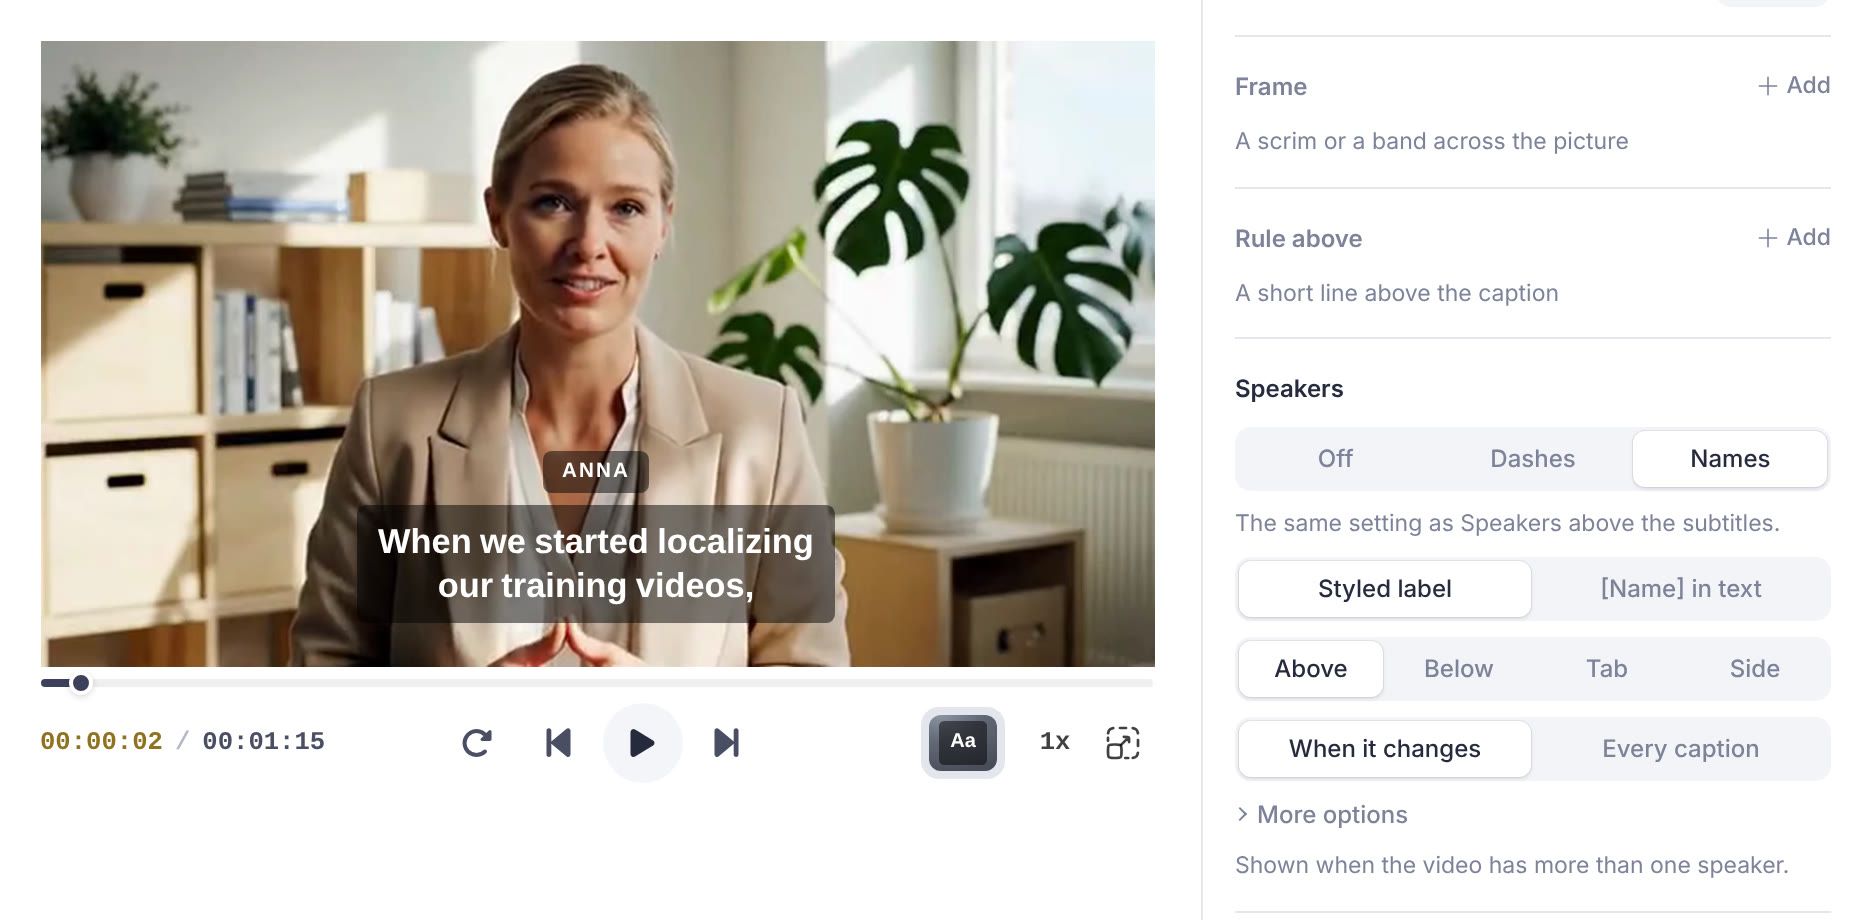
With Names on, every caption style shows the speaker's name as a label drawn in that style, apart from the text: a line above or below the caption, a tab on its plate, or a panel beside it, depending on the style. The label only shows when the video has more than one speaker. You can adjust it in the Caption style panel, Customize tab, Speakers section:
- Styled label or [Name] in text: the label drawn by the style, or the name written at the start of the text, as subtitle files do.
- Where the label goes: Above, Below, Tab or Side.
- When it shows: When it changes (on the first caption and at each change of speaker) or Every caption.
The same section has an Off / Dashes / Names switch, which is the same setting as the Speakers button above the subtitles. To write [Name] in the text by default for every video in a workspace, turn on Speaker names in the text under Workspace Settings, Caption styles, Rules for every style; each video can still choose.
In your exports
- When a track has speakers on, the download and Export Video windows have their own Speakers control, Off, Dashes or Names, so you can export a marked version and a clean version from the same track.
- Subtitle files (SRT, VTT and the others) carry the dash or the
[Speaker Name]label as plain text at the start of the subtitle. - Burned-in video: names look exactly as in the editor, drawn by the caption style.
- Transcripts (Word, PDF or text) offer Off or Names, since a dash means nothing in flowing text. With Names, the transcript is grouped by speaker.