

A glossary tells Fluen how specific words should be written: people's names, brands, acronyms, product names, technical terms. Add a term once and every file processed afterwards in that workspace spells it your way, in the captions and in each translation. This guide shows how to add terms one by one, import hundreds at once, and add them on the fly while uploading.
Open the Glossary
In the library, click Workspace Settings at the top, then Glossary in the settings menu. Each workspace has its own glossary, so a client's terms never leak into another client's files.
Add terms, one row each
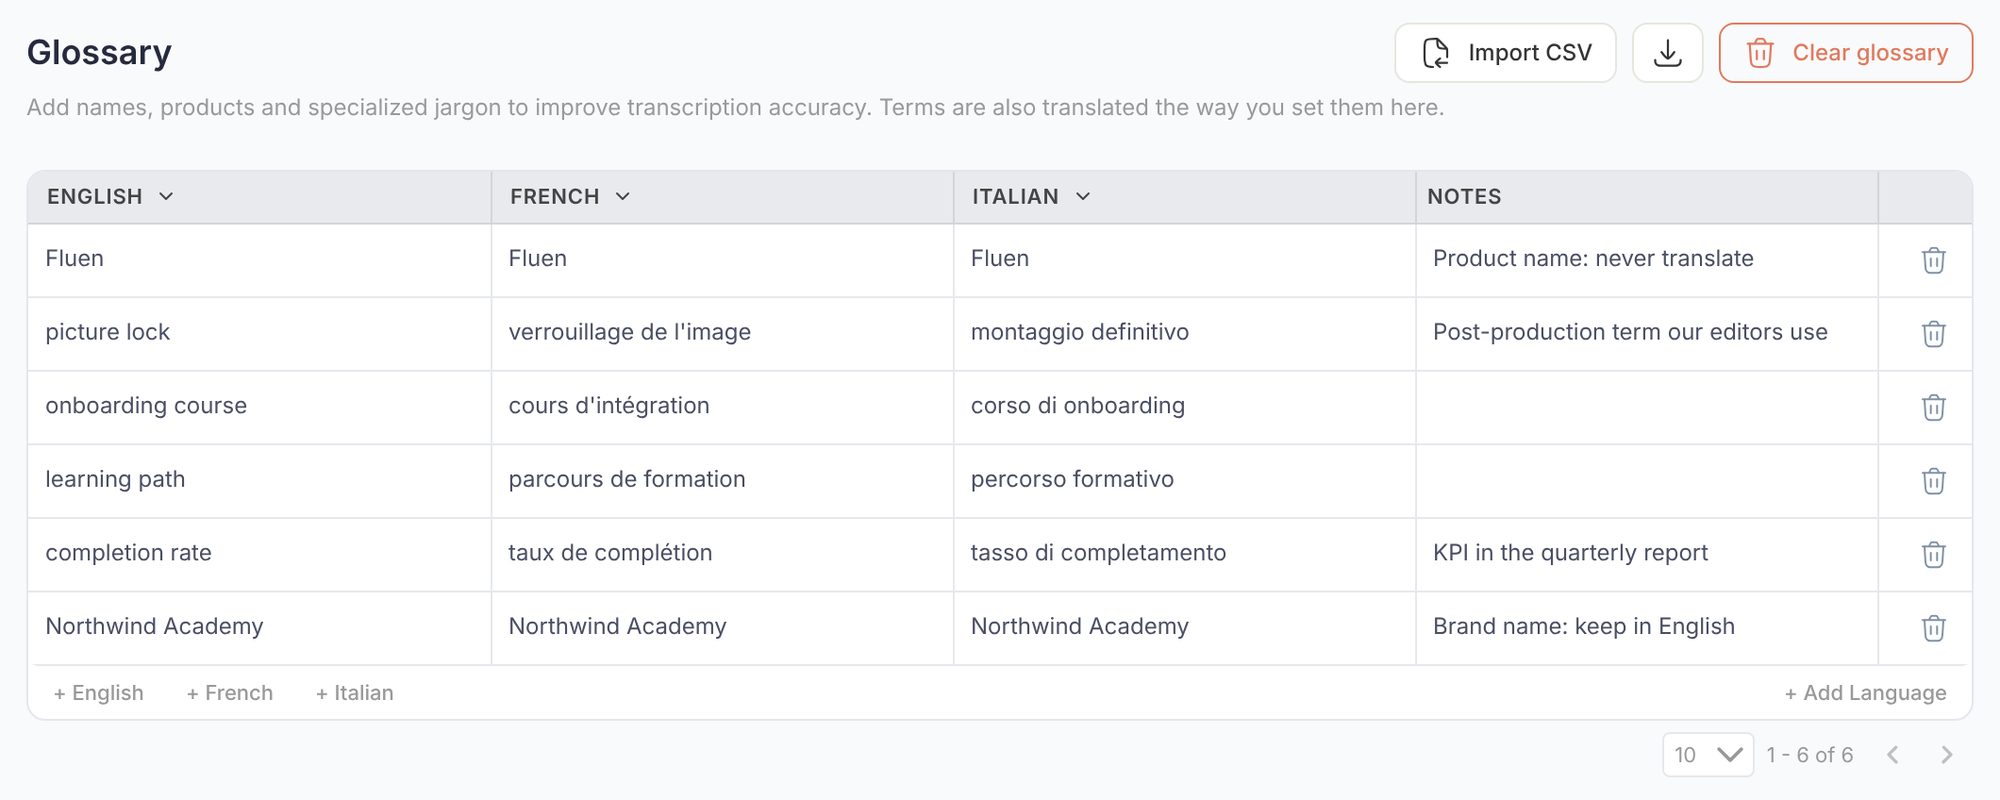
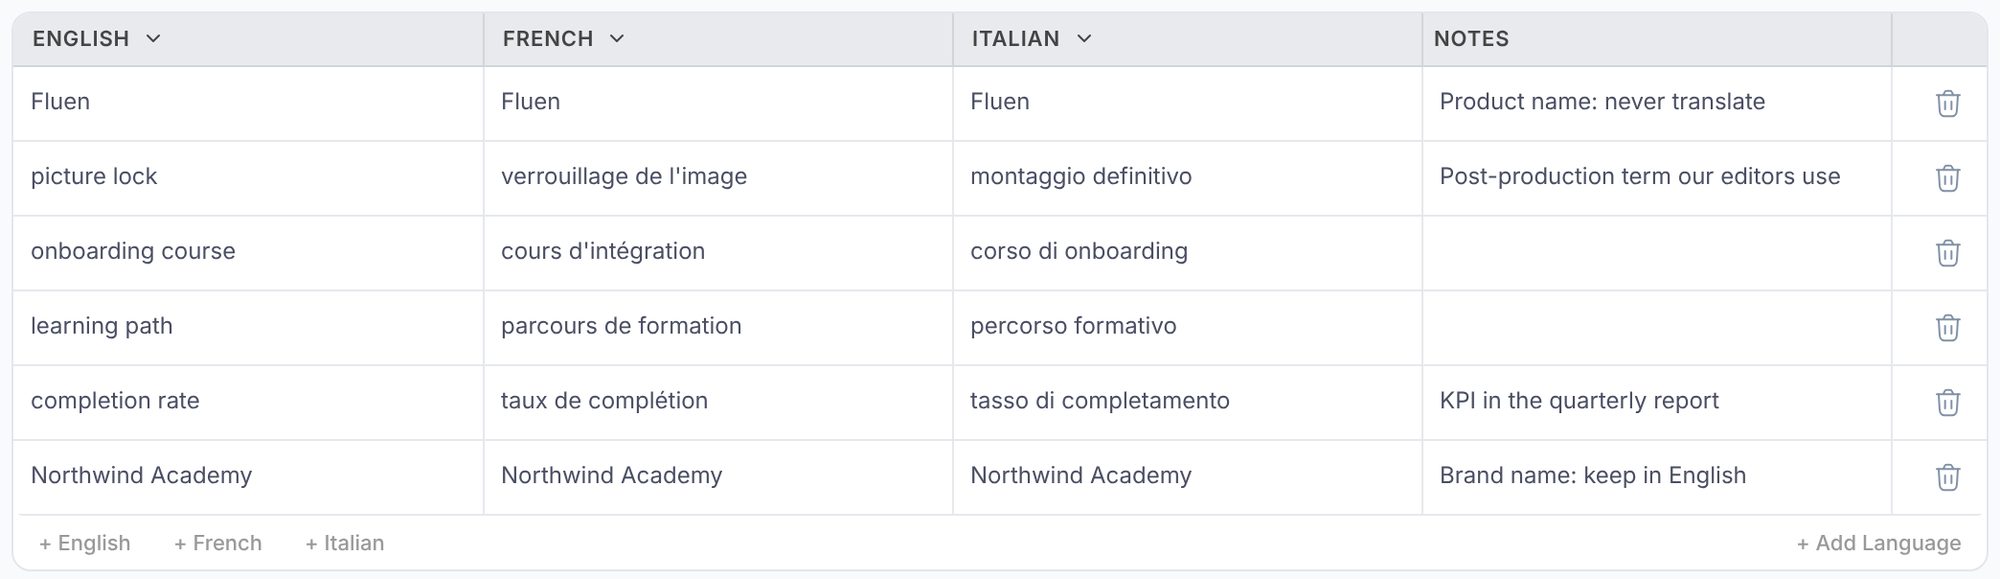
The glossary is a table with one column per language plus a Notes column for your own reminders. Click + Add Language to create the first column (usually your source language), then type each term in the "Type here" row exactly as it should appear in the captions (for example "Kubernetes", "Dr. Müller", "EBITDA"). Add a column for every language you translate into and type how the term should appear there, or repeat it if it must stay unchanged. Changes save automatically.
Import a list
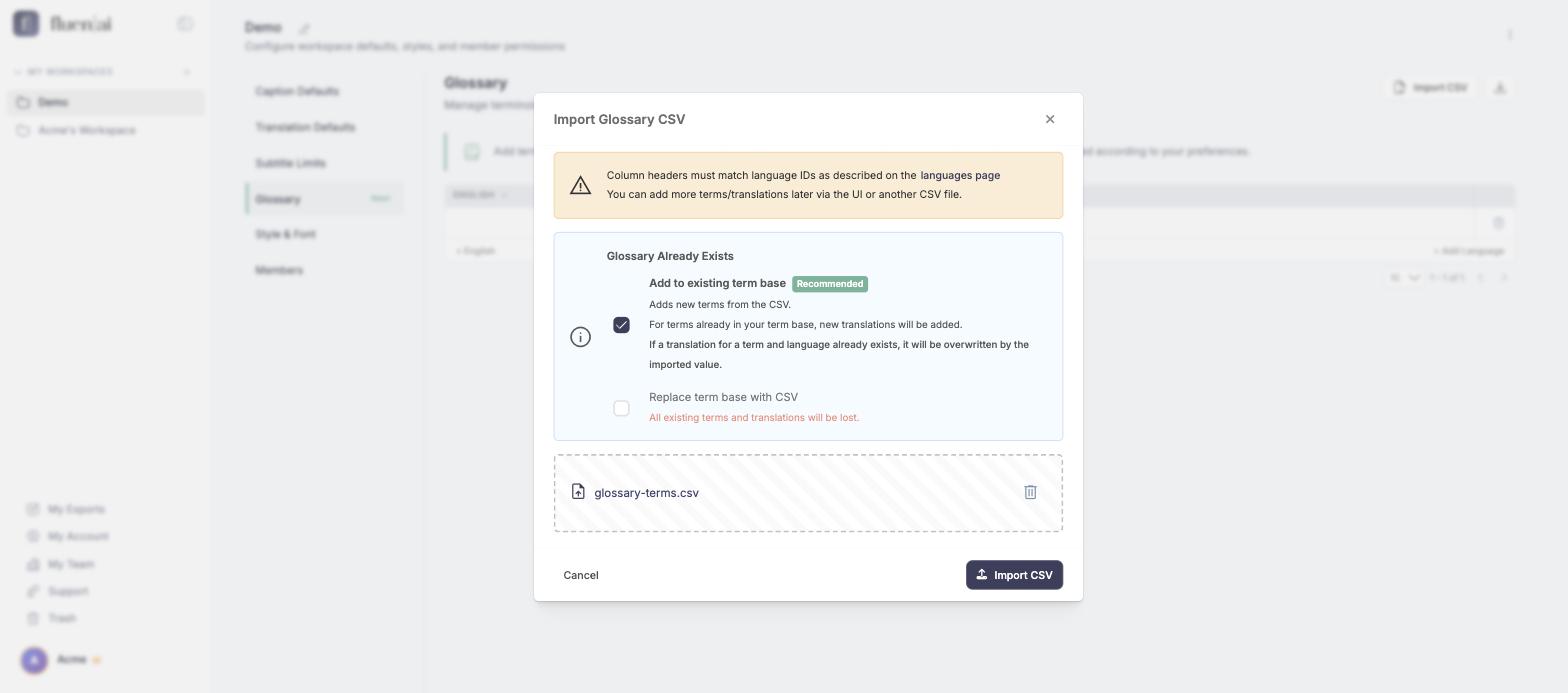
If you already keep terminology in a spreadsheet, export it as a CSV with one column per language and click Import CSV. The column headers must be Fluen's language codes (for example en-US, fr-FR, it-IT; the full list is on the languages page linked from the dialog). Choose Add to existing term base to merge with what is already there, or Replace term base with CSV to start over, then pick the file and click Import CSV. A single-column file with just the source terms works too. The download icon next to Import CSV exports the glossary as a CSV, which is also the easiest way to keep a backup.
Add terms while uploading
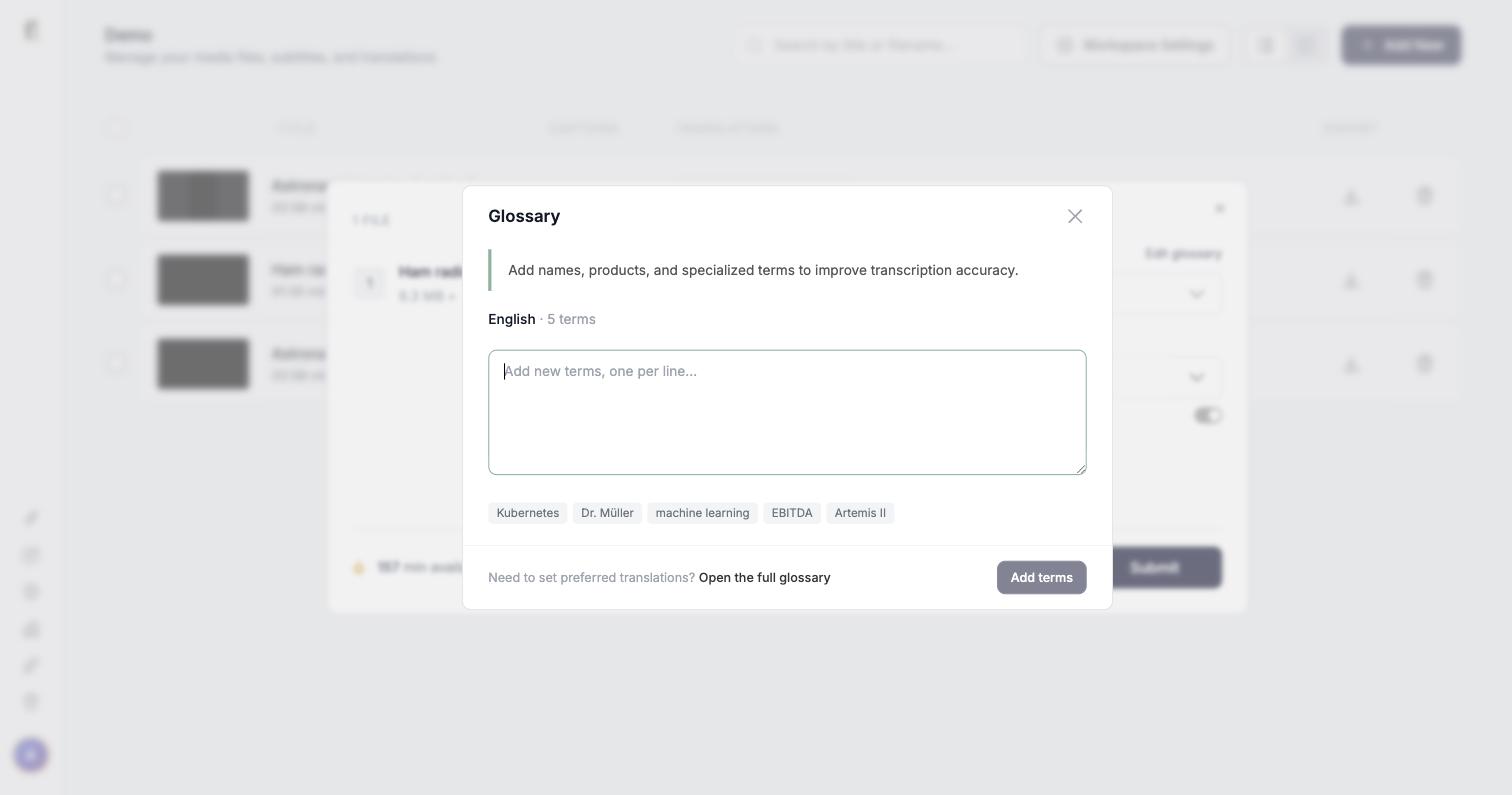
On the upload screen, once you have picked the source language, an Edit glossary link appears next to it. It opens a small Glossary panel that shows the terms already in the workspace and a box to add new terms, one per line. Paste the names from your script or agenda, click Add terms, and the file you are about to submit already benefits from them. The panel is for source-language terms; for translations, use Open the full glossary.
How the glossary is used
- During transcription, source-language entries guide the speech engine, so "Kubernetes" comes out as Kubernetes rather than a phonetic guess.
- During translation, paired entries make the translator use your preferred rendering for that language pair instead of its default.
- Entries apply to files processed after you add them. For a track that already exists, correct the term with the search icon in the editor toolbar (Find & Replace, or Ctrl+F, Cmd+F on a Mac), or, on a caption track in review, rerun it from the Troubleshoot menu with the "Names or terms are incorrect" option.
What to put in it
- Names of people who appear regularly, with the spelling they use themselves.
- Company, product and brand names, including unusual capitalisation ("iPhone", "GitHub").
- Acronyms that must not be expanded or translated.
- Industry terms with a preferred translation, where the common one is wrong for your field.
Start over with Clear glossary
To empty a glossary in one step, for example before importing a client's new list, click Clear glossary at the top of the page. A confirmation tells you how many terms will be deleted, with their translations, and suggests exporting a CSV first. Clearing cannot be undone. To replace the list with a file in one go, you can also choose Replace term base with CSV when importing.